Thursday, February 7, 2013

Pho*cking Delicious


 I must first apologize for the title's nod to vulgar language but I simply couldn't help myself! I must also apologize for my absence but work has picked up and I've not been afforded the opportunity to update. I would most probably go to sleep given how tired I am at the moment but I cannot. My world has been rocked by a Vietnamese stunner called Pho.

I grew up on Pho- a delicious brothy soup with thin slivers of beef, topped with loads of mint, bean sprouts, basil, cilantro and drizzled with hoisin sauce and siracha. It's aggressive in the best way possible. In Toronto this dish is so popular that Vietnamese restaurants serving a variety of delicacies are titled with the word Pho...I don't know if this is a cultural thing or if Pho is to Vietnamese in the West as sushi is to Japanese food. Whatever the case, pho is phontastic.. did it again!

Given my background as a chef, I am quite apt at figuring out what goes into something I've eaten. I'm not saying that I can guess every ingredient, however I have a pretty good grasp on ingredient lists and cooking methods. After researching Pho recipes I was shocked to learn that cinnamon, cardamom pods, star anise, coriander seeds and clove go into the stock! The trick to pho is its broth- it's full of subtle flavours and is super aromatic. If I never had Pho and read a recipe for it I would certainly give it a miss. However, I do urge you to try this recipe as there is a tremendous amount going on- rich broth, crunchy vegetables, earthy, salty, sweet spicy all heightened with loads of fresh herbs.

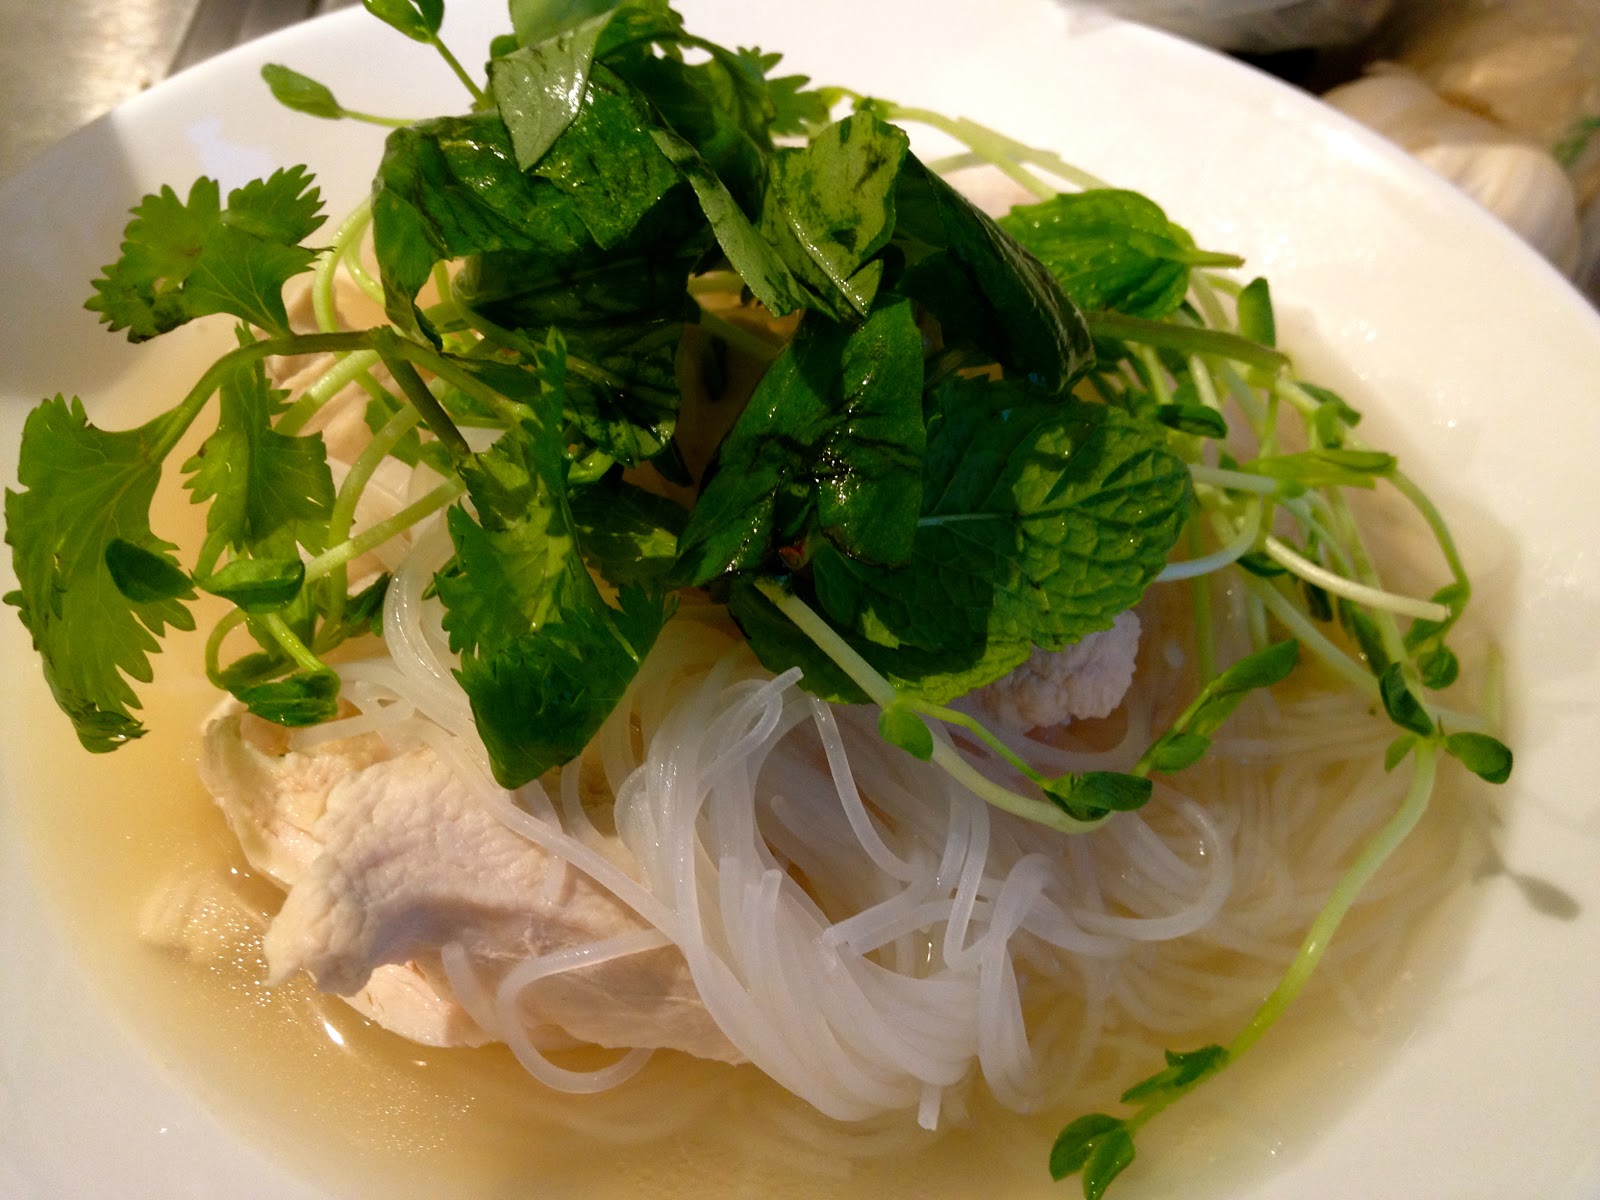
I had to make a few variations to the recipe due to the fact that I've moved to a relatively homogenous neighbourhood 30 minutes from Manhattan where the closest asian grocer is over 30 minutes away and the most exotic local cuisine is Thai..sigh...don't get me wrong, I love where I live but I wish the food around here was more adventurous! I substituted bean sprouts with snow pea shoots and while pho is traditionally made with beef, I made it with chicken and it was just as good or dare I say better!...ok I don't know about better but it was less rich and somewhat cleaner and not in a vs. dirty sort of way but in the ambiguous culinary term sort of way!

Ingredients:
1 pound chicken bones
2 fingers ginger, rough chopped
2 onions, peeled and cut in half
2 star anise
2 cloves
1 tablespoon coriander seed
2 cinnamon sticks
1 bay leaf
2 chicken breast, thinly sliced
1 bunch mint leaves
1 bunch cilantro
1 bunch basil leaves
1 package vermicelli noodles
Siracha
Hoisin sauce
Salt and pepper to taste
Cheese Cloth

Method:
Place coriander seeds, star anise, cloves, bay leaf and cinnamon sticks in a cheese cloth and tie with a butcher string. In a large stock pot add aromatic sachet, chicken bones, onion, garlic and water. Bring to a boil and reduce to a simmer.

You want the broth to be clear so you should be skimming the scum periodically over the next three hours. After 3 hours of skimming and simmering turn off heat and discard sachet, bones, onion and ginger with a slotted spoon.

Line a sieve with cheese cloth and place on top of another stock pot. Empty broth over sieve. The broth is supposed to be clear and free of scum so the cheese cloth sieve is worth it! It's an extra precaution but totally worth the effort given how much time you put into this wondrous broth!

Taste the broth- it should be very aromatic but bland. Add salt to your liking. Do it a little at a time but salt will bring out all the flavours from the ginger and spices! Salt and pepper your chicken slices.

Bring broth to a boil and add the chicken. Add vermicelli noodles that have been cooked according to packaged directions.

Place the fresh herbs and sprouts in a platter and condiments in separate bowls. Allow guests to garnish soup accordingly.

Tuesday, November 13, 2012

Tortilla Espanola!


A dear friend of my husband's visited us for lunch yesterday. His name is Luis and he is a lover of all things Spanish! His passion for Spanish food and culture is infectious and not at all arrogant. Luis also comes from a family of farmers and his father is the maker of Spain's finest Iberico. 

Inspired by Luis's culture, I decided to bring some of his national dishes to our home yesterday and made something quintessentially Spanish- Tortilla Espanola.

There are a lot of different methods to this recipe but if you want to stay true to form don't be persuaded to add any ingredients apart from these four- eggs, potatoes, sour cream (optional) and olive oil. The sour cream is my personal addition and only enhances the simplistic beauty of the dish.

I love how easy this is to eat, the sweet onion with a bit of bite dancing around my tongue with velvety potatoes and fluffy egg! It's divine!

Ingredients:
3 yukon gold potatoes peeled and cut into 1-2" cubes
6 eggs
1 large spanish onion, large dice
1/2 cup sour cream
olive oil
salt to taste

Method:
Preheat oven to 350.


Put potatoes in a small pot, cover with water and a dash of salt. Bring to a boil, remove from heat and cover for 5 minutes. Drain potatoes

Heat about 1.5 tablespoons of oil in a nonstick ovenproof skillet, when hot add the onions and cook on medium heat for about 1 minute. Add the potatoes and cook for about 5 minutes, frequently folding over with a wooden spoon. Taste the mixture for seasoning, add salt if desired. Strain the potatoes and onions of any excess oil by place on a strainer.

Beat eggs, sour cream and a pinch of salt and together. Add the potato and onion mixture and beat in with large whisk.

In the same pan you cooked the potatoes and onions in, remove any extra bits that may burn. Put 1.5 tablespoon oil on the pan, swirling it around so it coats the pan and put the heat on high. When it first starts to smoke, add the egg mixture and reduce the heat to medium. Cook for 1 minute. Place in the oven and bake for 10-15 minutes or until the egg has set.

Remove the pan from the oven. Carefully place a large dinner plate over the pan and flip it over. You can do this while hot or wait for the pan to cool as this can be enjoyed cold or hot!

Monday, July 30, 2012

Perfect Potato Gnocchi


There's nothing I cherish more than the combination of good food and family. Keeping this in mind, you can only imagine how excited I was to have my brother visit from Toronto! My brother Tristan is quite simply- amazing. He's brilliant, funny, artistic and shares my obsession with food. I know he's a big fan of gnocchi so I thought we could make some and serve it with oxtail ragu. It was delicious and he had about three proper servings!

I have tried MANY gnocchi recipes- ricotta gnocchi, boiled potato gnocchi, roasted potato gnocchi etc and no recipe tastes as good as this! It's light and pillowy yet maintains a certain level of density that we look for in a gnocchi. If you love this little potato dumpling as much as I do I urge you to make it! It's deceptively easy and doesn't require too much skill.

Ingredients:
2 pounds russet potato
1/2 cup freshly grated parm cheese
1/2 teaspoon salt
1 and 1/4 cup flour
4 egg yolks

Method:
Pierce potatoes with a fork and bake in a 400 degree oven for 1 hour or until cooked (as you would a baked potato).

Remove potato from skin and place in a ricer. When complete, on a clean surface, make a mound of potatoes and make a well in the center. Dust your hands with some flour. Add the eggs and cheese to the well and mix until just encorporated. Add the flour 1/4 cup at a time, kneading until you get a smooth dense ball. You may or may not use all the flour. You want it to be firm yet soft and not dry....use your intuition. Cut the dough into eights, roll between your hands so it makes a long rope that is about 3/4 inch thick. Cut into bite size pieces and either boil in salted water or place on a tray lined with parchment paper and sprinkled with flour and refrigerate until needed. Make sure that when you refrigerate your gnocchi is completely covered in plastic wrap so it doesn't dry.

Wednesday, June 27, 2012

Kale and Raisin Salad


My English brother-in-law observed that NYC has exploded with kale. Not literally of course. He couldn't help but notice that since he visited a couple years ago, the mighty green leaf has been popping up in some of NYC's best restaurants. Whether it's sauteed, baked or raw- kale is all the rage.

Influenced by the New York culinary scene, I started making kale salads a year or so back. However, I just discovered the best way to make it when eating at my neighbour Allison's house in good old Westchester. Allison made a really delicious dressing of balsamic, lime, honey and oil. She also tossed in slivered almonds and sweet raisins. I didn't think I'd enjoy it given that I'm not a fan of raisins in my food but I couldn't have been more wrong!

This salad was delicious. The acidity of the dressing broke down some of the tougher fibers in the kale and plumped up the raisins. The almonds added another dimension of nuttiness. It was sweet, sour, crunchy and SLIGHTLY bitter. The perfect balance of flavours!

Ingredients:
1 bunch of curly kale, washed thoroughly and chopped finely
1/4 cup raisins
1/4 cup slivered almonds
1 lime, juiced
1/2 tablespoon fig infused balsamic (balsamic will do)
1/2 tablespoon honey
1 tablespoon extra virgin olive oil
2 tablespoons grape seed oil
salt and pepper to taste

Method:
Mix the honey, oils, vinegar, lime juice, salt and pepper. Put in a microwave safe cup and heat for 10 seconds to melt the honey. Add the raisins to the dressing. Toss with the kale and let sit an hour in the fridge before serving. Add the almonds and toss well.

Friday, June 22, 2012

Raspberry and Cracked Pepper Parfait

So we've had a bit of a heat wave! With weather reaching the 100's I'm really in no mood for comfort food. I need to feel refreshed! I've had a diet of ceviche, ice cold coconut water and guacamole the past couple of days until I made this little treat! I wanted something creamy, sweet and fresh but couldn't be bothered to run out and buy ice cream. Instead I put together this lovely little parfait comprised of Greek yogurt, summer fresh raspberries, mint, honey and for a surprising little kick- fresh ground black pepper. "Ground pepper"?!?! You ask... "Yes"! Is my answer. It adds a playful little punch to the predictable flavor palette.

Ingredients:
1/4 cup raspberries
1/2 cup full fat Greek yogurt
4 mint leaves, ripped
a good drizzle of honey
two cracks of fresh black pepper

Method:
In your cutest bowl or martini glass assemble the parfait in the following order: Yogurt, berries, mint, honey and cracked pepper. Make in advance and refrigerate or eat straight away!

Thursday, June 21, 2012

My Very First Garden


I was in the 7th grade and cycled over to my best friend's house. His name was Carmen and he was Italian. His father, a very strong and broad man called us over for a snack. He set up a makeshift table with two crates for chairs. On the table he had a bottle of homemade wine, imported olive oil, a very rustic loaf of bread, salt, a plate and knife. "What kind of snack is this?!" I thought silently as I watched him walk over to  his garden. The sun bathed the scene and shone over tall tomato vines bearing the most beautiful red fruit. With the ease of one hand he plucked three tomatoes, washed them off with a hose and brought them to our table. I watched in awe and wonder as he roughly cut them, poured silky olive oil on them and lovingly sprinkled some salt. He ripped three pieces of bread from the one loaf, only looking up to say "mangia". We dipped bread in an oil enhanced by the sweet juices from summer ripe tomatoes, barely saying anything to each other. We were silently appreciating the simple joys brought to us by a man and his garden.

I vowed then that I would one day have my very own garden and make simplistic delicacies. I would literally reap what I sowed. And 15 years later I finally have one of my own and I absolutely love it! Every morning I run out and see what new developments took place. My string beans have sprung, some of the lettuces are mature, the zucchinis have blossoms and little baby buds and my tomato vines have shot up to the height of my thigh!

I cannot wait to post future developments and make meals sourced from my little garden:)

Sunday, May 27, 2012

Pear Tarte Tatin Parcels


Tarte tatin, be it pear, apple, peach or banana is one of my favourite desserts ever. I love the generous amount of flaky pastry, bittersweet caramel and slow cooked fruit!  Instead of going the traditional route of making a large pastry, I thought personalized little parcels would look a lot more impressive. Also, you get more of the amazing buttery pastry this way!! Although the dessert looks sophisticated, I promise that if you follow the steps exactly you will absolutely nail it!

I made these a couple of hours prior to serving them. They taste amazing fresh out of the oven or at room temperature!

Ingredients:
2 firm pears
4 star anise
1/4 cup room temperature butter
1 teaspoon lemon juice
1/2 cup sugar
1 package good quality puff pastry

Method:
Preheat oven to 425.

Meanwhile, peel, trim and core your pears (try to do it with a small melon baller). Press the star anise into the core of the pear so that it holds. Place the pear core side down and cover with puff pastry. Trim the edges off with a knife. Place on a baking tray lined with parchment paper and leave it in the fridge while you prep your caramel.

Place the lemon juice with the butter. Meanwhile, Put a thing layer of sugar in a non-stick ovenproof pan and set stove temperature to medium high. When the sugar starts to melt add another layer of sugar. Don't stir the sugar. Instead, slowly move the pan around in a circular motion using the handle. Repeat until the sugar is finished. When the sugar melts to a sort of light cola colour, turn off the heat and add the butter and lemon. Use a spoon to softly swirl the butter around. Continue to move the pan around so that the butter gets fully incorporated.

Place the Pears pastry side up and bake for 15-20 minutes or until the pastry is golden. Remove from oven and let cool for two minutes. With a palette knife, carefully remove the pear pastry and serve pastry side down with ice cream!